How to Tackle Bathtub Stains: A Comprehensive Guide to a Sparkling Clean Tub
1. Introduction
There's nothing quite like a relaxing soak in a clean, sparkling bathtub after a long day. However, the serene image of a pristine tub can quickly be shattered by the unwelcome sight of stubborn stains. Bathtub stains are a common household nuisance, marring the appearance of your bathroom and often making you question the cleanliness of your personal sanctuary. From unsightly rust rings to grimy soap scum and discolored patches, these blemishes can be frustratingly difficult to remove, leading many homeowners to feel overwhelmed and resigned to a less-than-perfect bathing experience.

Beyond the aesthetic appeal, a clean bathtub is crucial for hygiene and overall well-being. A stained tub can harbor bacteria, mold, and mildew, posing potential health risks and contributing to an unpleasant bathroom environment. Regular cleaning and effective stain removal are not just about maintaining appearances; they are about ensuring a healthy and inviting space for relaxation and personal care. Ignoring these stains can lead to deeper discoloration, damage to the tub's surface, and a more challenging cleaning task down the line.
This comprehensive guide aims to equip you with the knowledge and practical strategies needed to effectively tackle even the most persistent bathtub stains. We will delve into the various types of stains commonly found in bathtubs, exploring their origins and unique characteristics. More importantly, we will provide detailed, step-by-step cleaning methods tailored to each specific stain, utilizing readily available household products and simple techniques. Furthermore, we will emphasize the importance of proactive measures and offer valuable tips on preventing future stains, ensuring your bathtub remains a gleaming oasis. By the end of this article, you will be empowered to transform your stained tub into a sparkling clean haven, restoring its beauty and enhancing your bathing experience. Get ready to reclaim your bathtub and enjoy the satisfaction of a truly spotless bathroom.
2. Understanding Common Bathtub Stains and Their Causes
Before embarking on the cleaning journey, it's crucial to understand the enemy you're facing. Different types of bathtub stains arise from distinct causes and require specific approaches for effective removal. Identifying the culprit behind your tub's discoloration will save you time, effort, and potentially prevent damage to your bathtub's surface. Here's a breakdown of the most common bathtub stains and their underlying causes:
Hard Water Stains
Hard water is a prevalent issue in many households, characterized by a high concentration of dissolved minerals, primarily calcium and magnesium. When hard water evaporates from the surfaces of your bathtub, it leaves behind these mineral deposits, which accumulate over time to form unsightly stains. These stains typically appear as white, chalky residue or yellowish streaks, particularly around faucets, drains, and along the waterline. While not inherently harmful, hard water stains can make your bathtub look dull and dirty, and if left untreated, they can become increasingly difficult to remove.
Soap Scum
Soap scum is perhaps one of the most common and frustrating bathtub stains. It forms when the fatty acids in soap react with the minerals present in hard water, creating a sticky, grayish-white film. This residue adheres to the surfaces of your bathtub, shower walls, and even shower curtains. Soap scum is not only unsightly but also provides a breeding ground for bacteria and mold if not regularly cleaned. The more frequently you use soap and hard water in your tub, the faster soap scum will accumulate, making consistent cleaning essential.
Rust Stains
Rust stains are easily identifiable by their distinctive orange or brownish-red hue. These stains typically occur due to the presence of iron in your water supply, especially common in homes with well water or older plumbing systems that utilize galvanized iron pipes. Leaky faucets or metal objects left in the tub (like shaving cream cans or hairpins) can also contribute to rust formation. Rust stains can be particularly stubborn and may seem impossible to remove, but with the right approach, even deep-set rust can be tackled effectively.
Mold and Mildew
Bathrooms, with their inherent warmth and humidity, provide an ideal environment for the growth of mold and mildew. These fungi thrive in damp, poorly ventilated spaces and often appear as black, green, or sometimes even pinkish-black spots on grout lines, caulk, and around the edges of the bathtub. Beyond their unpleasant appearance, mold and mildew can pose health risks, triggering allergies and respiratory issues in sensitive individuals. Proper ventilation and regular cleaning are crucial to prevent their proliferation.
Pink Stains
While often mistaken for mold, pink stains in bathtubs and showers are typically caused by an airborne bacterium called Serratia marcescens. This bacterium thrives in moist environments and feeds on the phosphates and fatty substances found in soaps and shampoos. The pinkish-red discoloration is a byproduct of its metabolic processes. These stains are often found in areas that remain consistently damp, such as around drains, in grout lines, or on shower curtains. Although generally harmless to healthy individuals, Serratia marcescens can cause infections in those with compromised immune systems, making regular cleaning important.
3. Essential Cleaning Tools and Supplies
Before you begin your battle against bathtub stains, it's essential to gather the right arsenal of cleaning tools and supplies. Having everything at hand will make the process more efficient and effective. While many commercial cleaners are available, a surprising number of common household items can be incredibly powerful in tackling various stains, often with fewer harsh chemicals. Remember to always prioritize safety by wearing appropriate protective gear.

Basic Cleaning Agents
-
White Vinegar: A versatile and eco-friendly cleaner, white vinegar (acetic acid) is excellent for dissolving mineral deposits, soap scum, and even some mold. Its acidic nature makes it effective against alkaline stains. It's safe for most bathtub surfaces but should be used with caution on natural stone or enamel, as prolonged exposure can cause etching.
-
Baking Soda: Sodium bicarbonate, or baking soda, is a mild abrasive and a natural deodorizer. It's effective at scrubbing away grime and stains without scratching delicate surfaces. When combined with vinegar, it creates a fizzing reaction that helps lift stubborn deposits.
-
Bleach (Sodium Hypochlorite): A powerful disinfectant and whitener, bleach is highly effective against mold, mildew, and pink bacteria. However, it's a strong chemical and should be used in a well-ventilated area, never mixed with ammonia or acidic cleaners (like vinegar), as this can produce dangerous fumes. Always test in an inconspicuous area first, especially on colored surfaces.
-
Hydrogen Peroxide: A milder alternative to bleach, hydrogen peroxide is an effective disinfectant and can help lighten stains, particularly organic ones like those from hard water or mold. It's generally safer for a wider range of surfaces than bleach.
-
Dish Soap: Simple dish soap, especially grease-cutting varieties, is excellent for breaking down soap scum and general grime. It acts as a surfactant, helping to lift dirt and oils from the surface.
-
Lemon Juice: The citric acid in lemon juice makes it a natural bleaching agent and a mild acid, useful for tackling hard water stains and rust. It also leaves a fresh scent.
-
Bar Keepers Friend: This popular cleaner contains oxalic acid, making it particularly effective against rust stains, hard water deposits, and other tough mineral stains. It comes in both powder and liquid forms and is safe for most porcelain, ceramic, and fiberglass surfaces, but always check the product's instructions for specific materials.
Cleaning Tools
-
Scrub Brushes: A variety of brushes with different bristle stiffness will be useful. A stiff-bristled brush is good for grout and stubborn stains, while a softer brush or sponge is better for the main tub surface to prevent scratching.
-
Sponges: Non-abrasive sponges are ideal for general cleaning and applying solutions. For tougher spots, a slightly abrasive scrub sponge can be used with caution.
-
Microfiber Cloths: Excellent for wiping down surfaces, polishing, and drying, microfiber cloths are highly absorbent and leave surfaces streak-free.
-
Spray Bottles: Essential for mixing and applying liquid cleaning solutions, such as vinegar and water mixtures.
-
Gloves: Always wear rubber or latex gloves to protect your hands from cleaning chemicals and hot water.
-
Old Toothbrush: Perfect for reaching into tight corners, grout lines, and around fixtures where larger brushes can't go.
Safety Precautions
Safety should always be your top priority when cleaning. Here are some essential precautions:
- Ventilation: Ensure the bathroom is well-ventilated by opening windows and turning on the exhaust fan. This is especially critical when using strong chemicals like bleach or ammonia.
- Never Mix Chemicals: This is perhaps the most important rule. Never mix bleach with ammonia-based cleaners (like some glass cleaners) or acidic cleaners (like vinegar or toilet bowl cleaners), as this can create toxic gases that are extremely dangerous.
- Test in an Inconspicuous Area: Before applying any cleaner to a large area, always test it on a small, hidden spot of your bathtub to ensure it doesn't cause discoloration or damage.
- Read Labels: Always read and follow the instructions and warnings on commercial cleaning product labels.
- Protect Your Skin and Eyes: Wear gloves to protect your hands. If there's a risk of splashing, consider wearing eye protection.
- Keep Out of Reach of Children and Pets: Store all cleaning supplies securely away from children and pets.
4. Step-by-Step Cleaning Methods for Each Stain Type
Now that you understand the different types of stains and have your cleaning arsenal ready, let's dive into the specific methods for tackling each one. Remember to always test any cleaning solution on an inconspicuous area of your tub first, especially if you have a non-standard finish.

4.1. Tackling Hard Water Stains
Hard water stains, characterized by their white, chalky, or yellowish appearance, are mineral deposits left behind by evaporating water. The key to removing them is using an acidic cleaner to dissolve the minerals. Here are several effective methods:
Method 1: Vinegar and Water Solution
This is a simple, eco-friendly, and highly effective method for mild to moderate hard water stains.
- Prepare the Solution: Mix equal parts white vinegar and warm water in a spray bottle. For tougher stains, you can use undiluted white vinegar.
- Apply: Spray the solution generously over the hard water stains, ensuring the entire affected area is saturated.
- Let it Sit: Allow the solution to sit on the stains for at least 15-30 minutes. For very stubborn stains, you can let it sit for a few hours or even overnight. To keep the area wet, you can soak paper towels in the vinegar solution and lay them over the stains.
- Scrub: After the soaking time, use a non-abrasive sponge or a soft-bristled brush to scrub the stains. You should notice them beginning to dissolve.
- Rinse: Thoroughly rinse the bathtub with warm water. Wipe down the surface with a clean microfiber cloth to prevent new water spots.
Method 2: Baking Soda and Vinegar Paste
This method combines the abrasive power of baking soda with the acidic action of vinegar, creating a powerful cleaning paste for more stubborn hard water stains.
- Create the Paste: In a small bowl, mix about half a cup of baking soda with enough white vinegar to form a thick paste. It will fizz, which is a normal reaction. (Avoid making too much at once, as the fizzing will subside).
- Apply: Apply the paste directly onto the hard water stains. You can use a spoon or a gloved hand to spread it evenly.
- Let it Sit: Allow the paste to sit on the stains for 30 minutes to an hour. For very tough stains, you can leave it longer.
- Scrub: Use a damp sponge or a soft brush to scrub the paste into the stains. The mild abrasive nature of baking soda will help lift the deposits.
- Rinse: Rinse the bathtub thoroughly with warm water until all residue is gone. Dry with a clean cloth.
Method 3: Hydrogen Peroxide
Hydrogen peroxide is a good alternative if you prefer not to use vinegar or if the stains are particularly persistent.
- Apply: Pour or spray hydrogen peroxide directly onto the hard water stains. Ensure the area is well-saturated.
- Let it Sit: Allow the hydrogen peroxide to sit on the stains for about 30 minutes. For very old or deep stains, you might extend this to an hour or more.
- Scrub: Use a non-abrasive sponge or brush to scrub the stains. Hydrogen peroxide helps to break down the mineral bonds.
- Rinse: Rinse the tub thoroughly with water and wipe dry.
Method 4: Lemon and Salt
This natural method is effective for smaller, localized hard water stains and leaves a fresh scent.
- Prepare: Cut a lemon in half. Sprinkle a generous amount of salt (table salt or kosher salt works well) onto the cut surface of one lemon half.
- Scrub: Use the lemon half (salt-side down) to scrub the hard water stains directly. The citric acid in the lemon and the abrasive action of the salt work together to dissolve and lift the minerals.
- Let it Sit (Optional): For tougher stains, you can leave the lemon and salt mixture on the stain for 10-15 minutes before scrubbing again.
- Rinse: Rinse the area thoroughly with warm water and wipe clean.
4.2. Eliminating Soap Scum
Soap scum is a common problem, especially in areas with hard water. It forms a dull, grayish film that can be tough to remove if left to build up. Here are effective ways to tackle it:
Method 1: Vinegar and Water Solution
Similar to hard water stains, vinegar is highly effective against soap scum due to its acidic properties that break down the film.
- Prepare the Solution: Mix equal parts white vinegar and warm water in a spray bottle. For heavy soap scum buildup, use undiluted white vinegar.
- Apply: Spray the solution generously over the soap scum. Ensure good coverage on all affected surfaces, including the tub walls and floor.
- Let it Sit: Allow the solution to sit for at least 15-30 minutes. For very thick layers of soap scum, you might need to let it sit for an hour or more, or even reapply the solution.
- Scrub: Use a non-abrasive sponge or a soft-bristled brush to scrub the soap scum away. You should find it much easier to remove after the vinegar has had time to work.
- Rinse: Rinse the bathtub thoroughly with warm water. Wipe down with a clean microfiber cloth to prevent water spots and reveal a sparkling surface.
Method 2: Baking Soda and Lemon
This method combines the mild abrasive power of baking soda with the acidity of lemon juice to cut through soap scum and leave a fresh scent.
- Prepare: Dampen the surface of the bathtub where the soap scum is present. Sprinkle a generous amount of baking soda directly onto the damp areas.
- Scrub with Lemon: Cut a lemon in half. Use one half as a scrubbing tool, rubbing it directly over the baking soda and soap scum. The lemon juice will react with the baking soda, creating a gentle fizzing action that helps lift the grime.
- Let it Sit (Optional): For stubborn areas, you can leave the baking soda and lemon mixture on the surface for 10-15 minutes before continuing to scrub.
- Rinse: Rinse the bathtub thoroughly with warm water, ensuring all baking soda and soap scum residue is washed away. Dry with a clean cloth.
Method 3: Dish Soap and Baking Soda
This combination is excellent for breaking down the greasy components of soap scum and providing a gentle abrasive action.
- Create the Paste: In a small bowl, mix a few tablespoons of dish soap (preferably a grease-cutting variety) with enough baking soda to form a thick paste. The consistency should be similar to toothpaste.
- Apply: Apply the paste directly onto the soap scum. You can use a sponge or your gloved hand to spread it evenly over the affected areas.
- Let it Sit: Allow the paste to sit on the soap scum for 15-30 minutes. This gives the dish soap time to break down the grease and the baking soda to soften the buildup.
- Scrub: Use a damp sponge or a soft brush to scrub the soap scum. The abrasive nature of the baking soda will help to lift the film without scratching the tub surface.
- Rinse: Rinse the bathtub thoroughly with warm water until all the paste and soap scum are gone. Finish by wiping the tub dry with a clean cloth.
4.3. Removing Stubborn Rust Stains
Rust stains can be particularly challenging due to their strong adherence to surfaces. They are typically caused by iron in the water or metal objects left in the tub. The key to removing rust is often an acidic cleaner or a specialized rust remover. Always be cautious, as some rust removers can be harsh on certain tub finishes.
Method 1: Bar Keepers Friend
Bar Keepers Friend is a highly effective cleaner for rust stains, as it contains oxalic acid, which specifically targets rust and other mineral deposits. It comes in both powder and liquid forms.
- Wet the Surface: Lightly wet the rust-stained area of the bathtub.
- Apply Bar Keepers Friend: If using the powder, sprinkle a generous amount directly onto the wet stain. If using the liquid, apply it directly to the stain.
- Let it Sit: Allow the product to sit on the stain for a few minutes, typically 1 to 5 minutes. Do not let it dry on the surface, especially on delicate finishes.
- Scrub: Use a damp sponge or a non-abrasive scrub brush to gently scrub the stain. You should see the rust begin to lift away with minimal effort.
- Rinse: Thoroughly rinse the bathtub with water to remove all traces of the cleaner. Wipe dry with a clean cloth.
Method 2: Lemon Juice and Salt
This natural method is effective for lighter rust stains and is a good alternative if you prefer to avoid stronger chemicals. The citric acid in lemon juice helps to break down the rust, while the salt acts as a mild abrasive.
- Dampen the Stain: Lightly dampen the rust-stained area with water.
- Apply Lemon Juice and Salt: Squeeze fresh lemon juice directly onto the stain, ensuring it is well-covered. Then, sprinkle a generous amount of salt over the lemon juice.
- Let it Sit: Allow the mixture to sit on the stain for at least 3 to 4 hours. For very stubborn stains, you can leave it overnight. The longer it sits, the more time the acid has to work on the rust.
- Scrub: After the soaking time, use a microfiber cloth or a soft brush to scrub the stain. The salt will provide the necessary abrasion.
- Rinse: Rinse the bathtub thoroughly with warm water and wipe dry.
Method 3: Vinegar and Dish Soap
This combination can be surprisingly effective for rust stains, especially when the rust is not too deeply set. The vinegar acts as an acid, and the dish soap helps to lift and suspend the rust particles.
- Prepare the Solution: In a spray bottle, mix equal parts white vinegar and dish soap (a 50/50 ratio). Shake gently to combine.
- Apply: Spray the solution generously over the rust stains.
- Let it Sit: Allow the solution to sit on the stains for 30 minutes to an hour. For tougher stains, you can extend the time.
- Scrub: Use a non-abrasive sponge or a soft brush to scrub the stains. Apply gentle pressure as you scrub.
- Rinse: Rinse the bathtub thoroughly with warm water and wipe dry.
4.4. Conquering Mold and Mildew
Mold and mildew thrive in damp, humid environments like bathrooms. They appear as black, green, or sometimes even pinkish-black spots. While unsightly, they can also pose health risks. Proper ventilation is key to prevention, but here's how to clean them:
Method 1: Bleach and Water Solution
Bleach is a powerful disinfectant and highly effective against mold and mildew. Use with caution and ensure good ventilation.
- Prepare the Solution: Mix one part bleach with two parts water in a spray bottle. NEVER mix bleach with ammonia or vinegar, as this creates toxic fumes.
- Apply: Spray the solution directly onto the mold and mildew affected areas. Ensure the area is well-saturated.
- Let it Sit: Allow the solution to sit for 10-15 minutes. For very stubborn mold, you can let it sit a bit longer, but do not let it dry on the surface.
- Scrub: Use a stiff-bristled brush (an old toothbrush is great for grout lines) to scrub the mold and mildew away. You should see it disappear with relative ease.
- Rinse: Thoroughly rinse the bathtub with water to remove all bleach residue. Dry the surface to prevent immediate re-growth.
Method 2: Bleach and Baking Soda Paste
This method combines the cleaning power of bleach with the mild abrasive action of baking soda for a more targeted approach on tough mold spots.
- Create the Paste: In a small, non-metal bowl, mix a small amount of bleach with enough baking soda to form a thick paste. The consistency should be similar to toothpaste.
- Apply: Apply the paste directly onto the mold and mildew spots. You can use a spoon or an old toothbrush for precise application.
- Let it Sit: Allow the paste to sit on the mold for several hours, or even overnight, for maximum effectiveness. This allows the bleach to penetrate and kill the mold.
- Scrub: After the soaking time, use a damp sponge or brush to scrub the paste and mold away.
- Rinse: Rinse the bathtub thoroughly with warm water until all residue is gone. Dry the surface completely.
Method 3: Hydrogen Peroxide
Hydrogen peroxide is a milder, non-toxic alternative to bleach for killing mold and mildew, especially useful if you prefer to avoid harsh chemicals.
- Apply: Pour or spray undiluted 3% hydrogen peroxide directly onto the mold and mildew. Ensure the area is well-saturated.
- Let it Sit: Allow the hydrogen peroxide to sit on the affected area for at least 10 minutes. For tougher mold, you can let it sit for 30 minutes or more.
- Scrub: Use a scrub brush or sponge to scrub the mold away. The hydrogen peroxide will help to loosen and kill the mold spores.
- Rinse: Rinse the bathtub thoroughly with water and wipe dry.
4.5. Addressing Pink Stains
Pink stains, often mistaken for mold, are typically caused by the airborne bacterium Serratia marcescens. These bacteria thrive in moist environments and feed on soap residue. While generally harmless to healthy individuals, they can be unsightly. Here’s how to get rid of them:
Method 1: Vinegar and Water Solution
Vinegar’s acidic properties can effectively kill Serratia marcescens and remove the pink discoloration.
- Prepare the Solution: Mix equal parts white vinegar and water in a spray bottle. For more stubborn pink stains, you can use undiluted vinegar.
- Apply: Spray the solution generously over the pink stains, ensuring complete coverage.
- Let it Sit: Allow the solution to sit on the stains for 15-30 minutes. For persistent stains, let it sit longer or reapply.
- Scrub: Use a non-abrasive sponge or brush to scrub the stained area. The stains should begin to disappear.
- Rinse: Rinse the bathtub thoroughly with warm water and wipe dry to prevent new bacterial growth.
Method 2: Chlorine Bleach
Chlorine bleach is a powerful disinfectant that can effectively kill Serratia marcescens and remove pink stains. Use with caution and ensure good ventilation.
- Prepare the Solution: Mix one part chlorine bleach with two parts water in a spray bottle. As always, NEVER mix bleach with ammonia or vinegar.
- Apply: Spray the bleach solution directly onto the pink stains. Ensure the area is well-saturated.
- Let it Sit: Allow the solution to sit for 10-15 minutes. The bleach will disinfect and whiten the stained area.
- Scrub (Optional): For any remaining residue, gently scrub with a non-abrasive brush or sponge.
- Rinse: Thoroughly rinse the bathtub with plenty of water to remove all bleach residue. Dry the surface completely to discourage bacterial regrowth.
5. General Bathtub Cleaning Tips for All Stain Types
Beyond specific stain removal techniques, adopting a few general cleaning habits can significantly contribute to maintaining a clean and stain-free bathtub. These tips are applicable regardless of the stain type and focus on consistent care and proper cleaning practices.
Establish a Regular Cleaning Routine
Consistency is key to preventing stain buildup. Instead of waiting for severe stains to appear, incorporate regular, perhaps weekly, cleaning into your routine. A quick wipe-down with a general bathroom cleaner or a vinegar-water solution after each use can go a long way in preventing soap scum and hard water deposits from forming. For a deeper clean, dedicate a specific day each week to thoroughly scrub the tub.
Ensure Proper Ventilation
Moisture is the primary catalyst for mold, mildew, and pink bacterial growth. Proper ventilation helps to dry out the bathroom quickly after showers and baths, significantly reducing the humidity levels that these organisms thrive in. Always use your exhaust fan during and after bathing, or open a window if possible. Leaving the bathroom door ajar can also help improve air circulation.
Avoid Abrasive Cleaners and Tools
While it might be tempting to use harsh abrasive cleaners or scrub brushes with stiff bristles on stubborn stains, this can actually damage your bathtub's surface. Many modern bathtubs are made of acrylic, fiberglass, or enamel, which can be easily scratched or dulled by abrasive materials. Scratches not only make the tub look worn but also create microscopic crevices where dirt, soap scum, and mold can accumulate, making future cleaning even more difficult. Always opt for non-abrasive cleaners and soft sponges or microfiber cloths, unless the tub material is specifically designed to withstand abrasives (e.g., cast iron with a durable enamel finish).
Test Cleaners in an Inconspicuous Area
Before applying any new cleaning product or homemade solution to a large area of your bathtub, always perform a patch test in an inconspicuous spot. This could be a small corner of the tub, an area under the faucet, or behind the overflow drain. Apply a small amount of the cleaner, let it sit for the recommended time, and then rinse. Check for any discoloration, etching, or damage to the surface. This simple step can save you from accidentally ruining your tub's finish.
Read Your Bathtub's Manufacturer Guidelines
Different bathtub materials (acrylic, fiberglass, porcelain, cast iron, cultured marble, etc.) have varying sensitivities to chemicals and cleaning methods. For instance, while vinegar is excellent for many tubs, it can etch natural stone or some enamel finishes if left on for too long. Bleach, while effective, can also be too harsh for certain materials. If you know the material of your bathtub, it's always best to consult the manufacturer's cleaning and care guidelines. This information can often be found online or in the original product manual. Following these recommendations will ensure the longevity and pristine appearance of your tub.
6. Preventing Bathtub Stains: Proactive Measures

While knowing how to remove bathtub stains is essential, preventing them in the first place is even better. Proactive measures can significantly reduce the frequency and intensity of cleaning required, keeping your bathtub looking pristine with minimal effort. Incorporating these habits into your daily and weekly routine will save you time and frustration in the long run.
Wipe Down the Tub After Each Use
This is perhaps the simplest yet most effective preventive measure. After every shower or bath, take a few moments to wipe down the entire surface of the tub with a clean cloth or squeegee. This removes water droplets, soap residue, and any lingering dirt before they have a chance to dry and form stains. Pay particular attention to areas around faucets and the waterline where hard water and soap scum tend to accumulate. This quick habit can drastically cut down on future cleaning efforts.
Use a Daily Shower Spray
Daily shower sprays are designed to prevent soap scum and hard water buildup. These products typically contain ingredients that help water bead up and run off surfaces, and they often include mild cleaning agents that break down residue before it hardens. You can purchase commercial daily shower sprays or make your own by mixing equal parts white vinegar and water in a spray bottle. After your shower, simply spray the entire tub and shower area. There's no need to rinse or wipe, making this a convenient way to maintain cleanliness.
Install a Water Softener
If you live in an area with hard water, a water softener can be a game-changer for preventing a variety of stains, especially hard water and soap scum. A water softener removes minerals like calcium and magnesium from your water supply before it reaches your fixtures. This not only prevents mineral buildup in your bathtub but also extends the life of your plumbing and appliances, and makes soaps and shampoos lather more effectively. While an initial investment, a water softener can save you significant time and money on cleaning products and repairs in the long run.
Address Leaks Promptly
Even a small, persistent drip from a faucet can lead to significant rust or hard water stains over time. The constant flow of water, especially if it's hard or contains iron, will deposit minerals or cause rust to form in the same spot repeatedly. Regularly inspect your faucets and showerheads for leaks. If you notice any drips, address them immediately by tightening connections, replacing washers, or calling a plumber. Fixing leaks not only prevents stains but also conserves water and reduces your utility bills.
Maintain Good Ventilation
As discussed earlier, mold, mildew, and pink bacteria thrive in moist, humid environments. Ensuring proper ventilation is crucial for preventing their growth. Always use your bathroom exhaust fan during and for at least 15-20 minutes after showering or bathing. If you don't have an exhaust fan, open a window to allow steam and moisture to escape. Keeping the bathroom door ajar when not in use can also help improve air circulation and reduce humidity levels, making your bathroom less hospitable to these unwelcome guests.
7. When to Call a Professional
While many bathtub stains can be effectively tackled with DIY methods and readily available household cleaners, there are instances when it's best to call in a professional. Knowing when to seek expert help can save you time, prevent further damage to your bathtub, and ensure a truly clean and safe environment.
Severe, Persistent Stains
If you've tried multiple cleaning methods, including those outlined in this guide, and the stains in your bathtub remain stubbornly present, it might be time to consult a professional. Extremely old, deeply set stains, or those caused by unusual chemical reactions, may require specialized knowledge, equipment, or stronger, professional-grade products that are not available to the general public. Professionals can often identify the exact nature of the stain and apply the most effective treatment without damaging your tub's finish.
Damage to the Tub Surface
Sometimes, what appears to be a stain might actually be damage to the bathtub's surface itself. This could include etching, chipping, cracking, or discoloration of the enamel or acrylic finish. Attempting to scrub away surface damage can worsen the problem, leading to more extensive repairs or even the need for a full tub replacement. A professional can assess the damage and advise on whether repair, refinishing, or replacement is the most appropriate course of action. Bathtub refinishing services can restore the look of an old, damaged tub, making it appear brand new without the cost and hassle of a full replacement.
Health Concerns Related to Mold
While small patches of mold and mildew can be managed with household cleaners, extensive mold growth, especially if it covers large areas or appears to be growing behind walls or under the tub, can indicate a more serious moisture problem. Large-scale mold infestations can pose significant health risks, particularly for individuals with allergies, asthma, or compromised immune systems. In such cases, it's crucial to call a professional mold remediation specialist. They have the expertise and equipment to safely and effectively remove mold, address the underlying moisture issue, and prevent its recurrence, ensuring your home environment is healthy and safe.
8. Conclusion
Maintaining a clean and sparkling bathtub doesn't have to be a daunting task. By understanding the different types of stains, their causes, and the most effective cleaning methods, you are now well-equipped to tackle virtually any bathtub blemish. From the mineral deposits of hard water to the greasy film of soap scum, the stubborn grip of rust, and the unwelcome presence of mold, mildew, and pink bacteria, each challenge has a practical and often simple solution.
Remember, the power lies not just in knowing how to clean, but also in adopting proactive measures to prevent stains from forming in the first place. Regular wiping, daily sprays, considering a water softener, promptly addressing leaks, and ensuring good ventilation are your best allies in the ongoing battle for a pristine tub. These habits, though seemingly small, collectively contribute to a significant reduction in cleaning effort and a consistently cleaner bathroom environment.
Ultimately, a clean bathtub is more than just an aesthetic luxury; it's a vital component of a healthy and inviting home. It provides a sanctuary for relaxation and personal care, free from the distractions of unsightly marks. By applying the knowledge and techniques shared in this guide, you can transform your cleaning routine from a chore into a satisfying process, ensuring your bathtub remains a gleaming oasis for years to come. Embrace these tips, and enjoy the lasting satisfaction of a truly spotless and hygienic bathing space.
Written by Annie Jones
Annie Jones has spent the past six years immersed in the world of bathroom design and renovation. With hands-on experience working alongside designers and visiting countless showrooms, she brings a practical eye for detail and a passion for functional style. Her insights help readers navigate choices in bathtubs, showers, and fixtures, always balancing everyday comfort with timeless design.
Featured Products
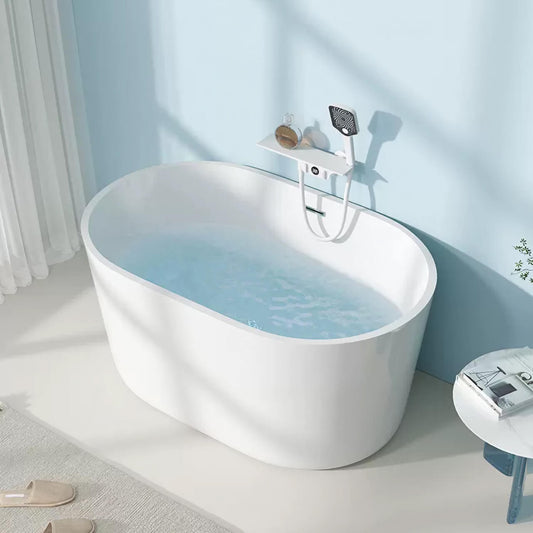
Baignoire ovale simple en acrylique blanche de 35 pouces
- Depuis $2,108.00
$2,635.00- Depuis $2,108.00
- Prix unitaire
- / par
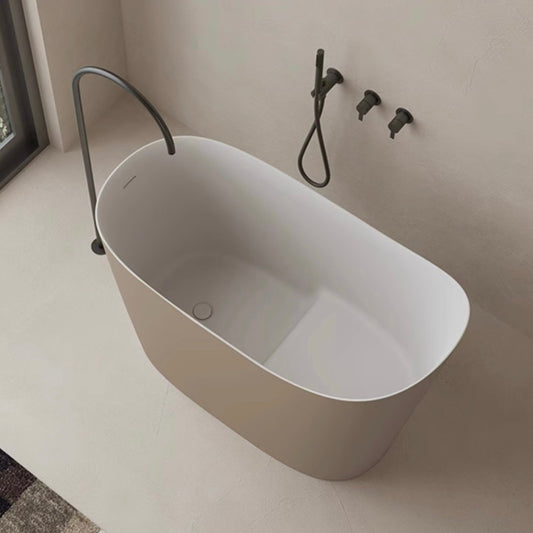
43" Baignoire japonaise à tremper profonde autoportante moderne oblique en résine de pierre brun clair
- $4,760.00
$5,950.00- $4,760.00
- Prix unitaire
- / par
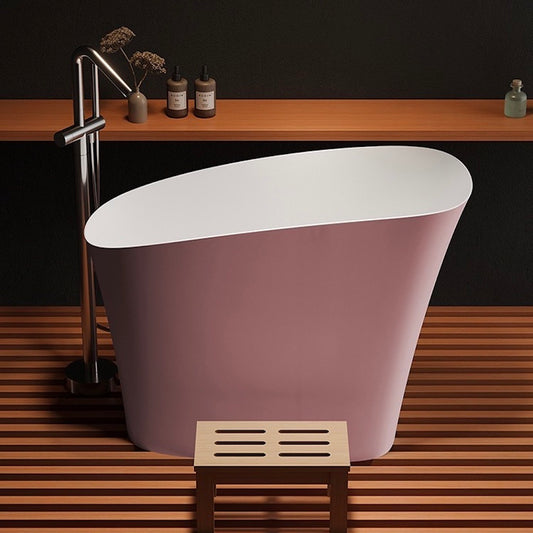
Baignoire ovale rose de 47 pouces en nouvelle pierre synthétique pour trempage unique
- $4,440.00
$5,550.00- $4,440.00
- Prix unitaire
- / par
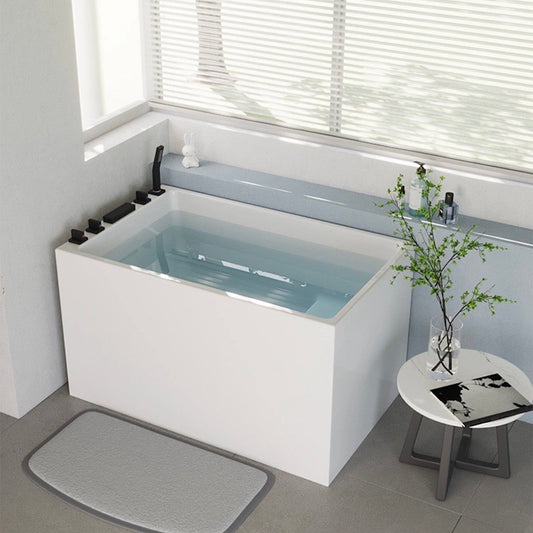
Baignoire de trempette rectangulaire en acrylique de 47 pouces en blanc
- Depuis $2,028.00
$2,535.00- Depuis $2,028.00
- Prix unitaire
- / par
Baignoire de trempage rectangulaire en acrylique blanc de 47 pouces avec massage
- Depuis $3,699.00
$4,274.00- Depuis $3,699.00
- Prix unitaire
- / par
Baignoire ovale simple en acrylique blanche de 47 pouces
- Depuis $1,858.00
$2,173.00- Depuis $1,858.00
- Prix unitaire
- / par
Baignoire de trempage blanche en acrylique de 47 pouces pour un utilisateur unique - Forme rectangulaire
- Depuis $1,758.00
$2,198.00- Depuis $1,758.00
- Prix unitaire
- / par
Baignoire de trempage simple ovale en acrylique de 49 pouces en blanc brillant
- Depuis $2,646.00
$3,308.00- Depuis $2,646.00
- Prix unitaire
- / par
Baignoire de trempage simple ovale en pierre artificielle de 51 pouces en blanc
- Depuis $4,000.00
$5,000.00- Depuis $4,000.00
- Prix unitaire
- / par
Baignoire de trempage ovale simple en acrylique blanc de 51 pouces
- Depuis $3,000.00
$3,750.00- Depuis $3,000.00
- Prix unitaire
- / par
Baignoire de trempage simple acrylique rectangulaire de 55 pouces en blanc
- Depuis $4,779.00
$5,974.00- Depuis $4,779.00
- Prix unitaire
- / par
Baignoire de trempage simple en forme de lune de 59 pouces en acrylique blanc
- Depuis $2,328.00
$2,910.00- Depuis $2,328.00
- Prix unitaire
- / par
